Remove the solenoid from the valve.
Most solenoids unscrew counter-clockwise to remove. When removing the solenoid watch that the spring loaded plunger inside it does not pop-out and fall into a mud puddle. On most newer valves the plunger is held “captive” so it won’t fall out when the solenoid is removed, but sometimes even those ones come loose. Once the solenoid is removed, push in on the end of the spring-loaded plunger in the solenoid. It should spring gently back out when released, and it should slide in and out smoothly when pressed several times in a row. If the plunger doesn’t move easily and smoothly, replace the solenoid; it is damaged and can’t be repaired. Do not apply any oil or lubricant to the solenoid plunger, if it is sticking it is not repairable, replace it.
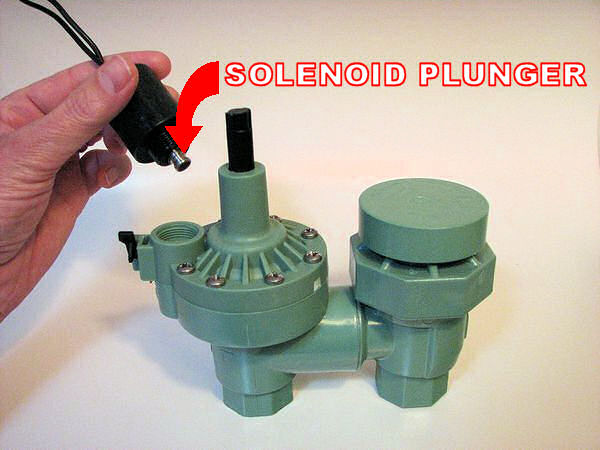
Solenoid Removed, Showing Plunger
Remove the valve lid, most are held in place by several metal screws. Some models of valve have lids that screw off like the top of a jar, turn counter-clockwise (lefty losey) to remove this type of lid. You may need to use a strap wrench to remove the jar-top style lids. All valves have a spring under the lid, don’t let it fall out into the mud! Remove the spring and set it aside.
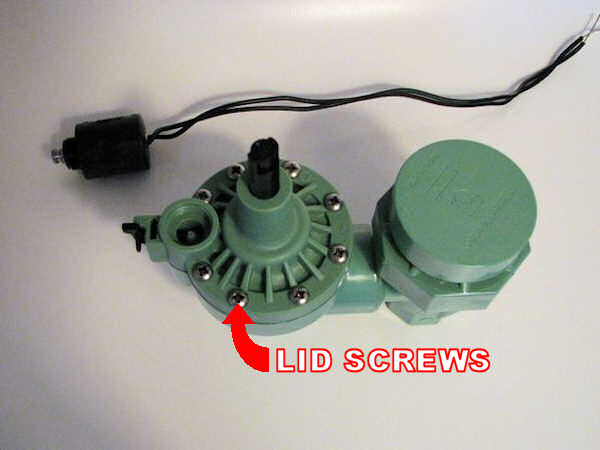
Valve Lid Screws
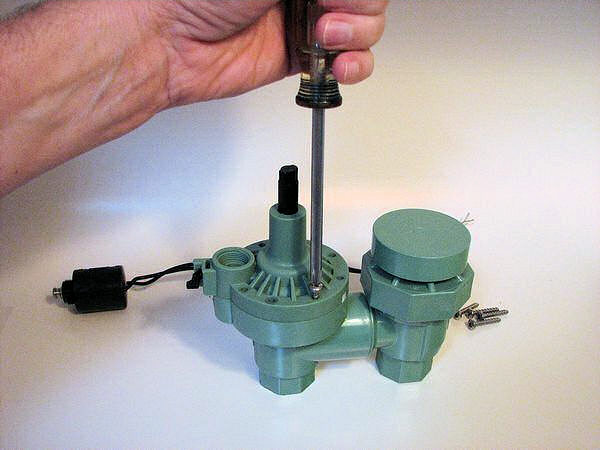
Removing Valve Lid Screws
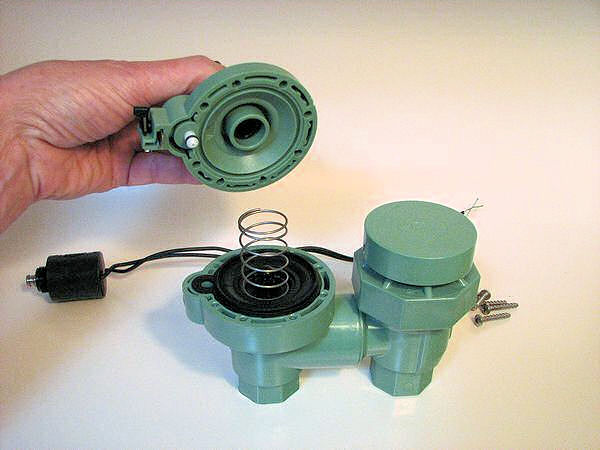
Watch that the Spring Does Not Fall Out When Removing the Lid
Look for the tiny passages, called “ports”, inside the valve lid.
These ports lead from the bottom of the lid to the area where the solenoid was attached. The exact location of the ports varies with each valve brand and model. Make sure these passages are not clogged with a grain of sand or whatever. Be careful you do not scratch or enlarge these passages when trying to get the sand out! Do not try to drill out these ports to clean them or make them larger.
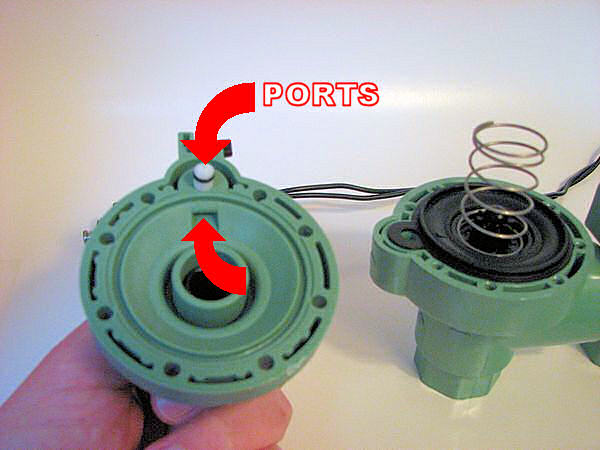
Ports in Lid
Remove the rubber diaphragm from the valve. Make sure it is not cracked or broken, if it is replace it. Some valve models also have a port in the diaphragm, check to see if there is one, if so make sure it is clean. On some valves the port in the diaphragm has a metal pin that runs through it, the purpose of the pin is to keep the port clean. The pin should slide freely in the port. The diaphragm in the photo below has a separate, removable seat gasket attached to the bottom of it with a screw. On many valves the rubber seat gasket and the diaphragm are one piece and the seat gasket is not removable. Make sure the seat gasket or diaphragm seat does not have anything stuck on it, like a grain of sand or twig. If the gasket surface is scratched or torn replace the gasket or diaphragm.
Examine the valve seat in the bottom of the valve body. The seat is the part of the valve body that the gasket presses against to stop the water flow through the valve. Make sure the seat is not scratched or pitted, if it is the valve will leak when closed. On some valves the seat is replaceable. On some brass valves the seat can be ground down with a special tool to remove pits and scratches. However, for most valves if the seat is scratched or pitted, the valve is not repairable and must be replaced.
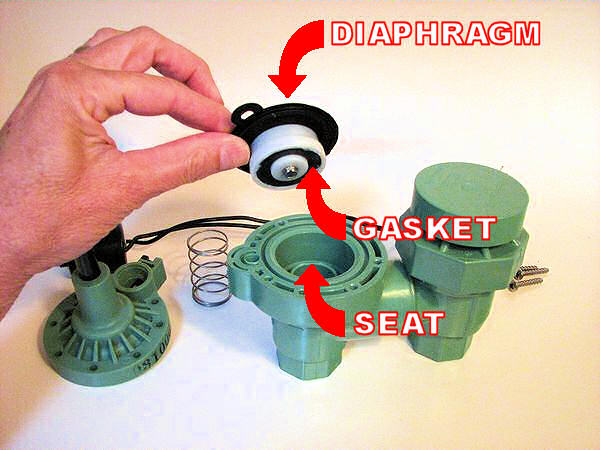
Rubber Diaphragm and Gasket
With the valve disassembled turn on the water to flush any remaining sand and crud from the pipes upstream of the valve. Turn it on full blast, and run it for a minute or two, you need to get everything out of that pipe. Turn off the water, and dry yourself off. I know you don’t want to get wet, but don’t skip flushing the pipes and valve body, this is an important step!
Provided free of charge for homeowners and professionals, these tutorials has been continuously refined since 1995 to teach professional irrigation methods. Although the content is optimized for Western U.S.A. environments, its scientific principles are applicable globally. By using this information, the user agrees that no warranties or guarantees are provided, and they assume all responsibility for the suitability of the design for their specific project.